Console connection to a cloud instance on the OpenStack platform is made using the VNC (Virtual Network Computing) system.
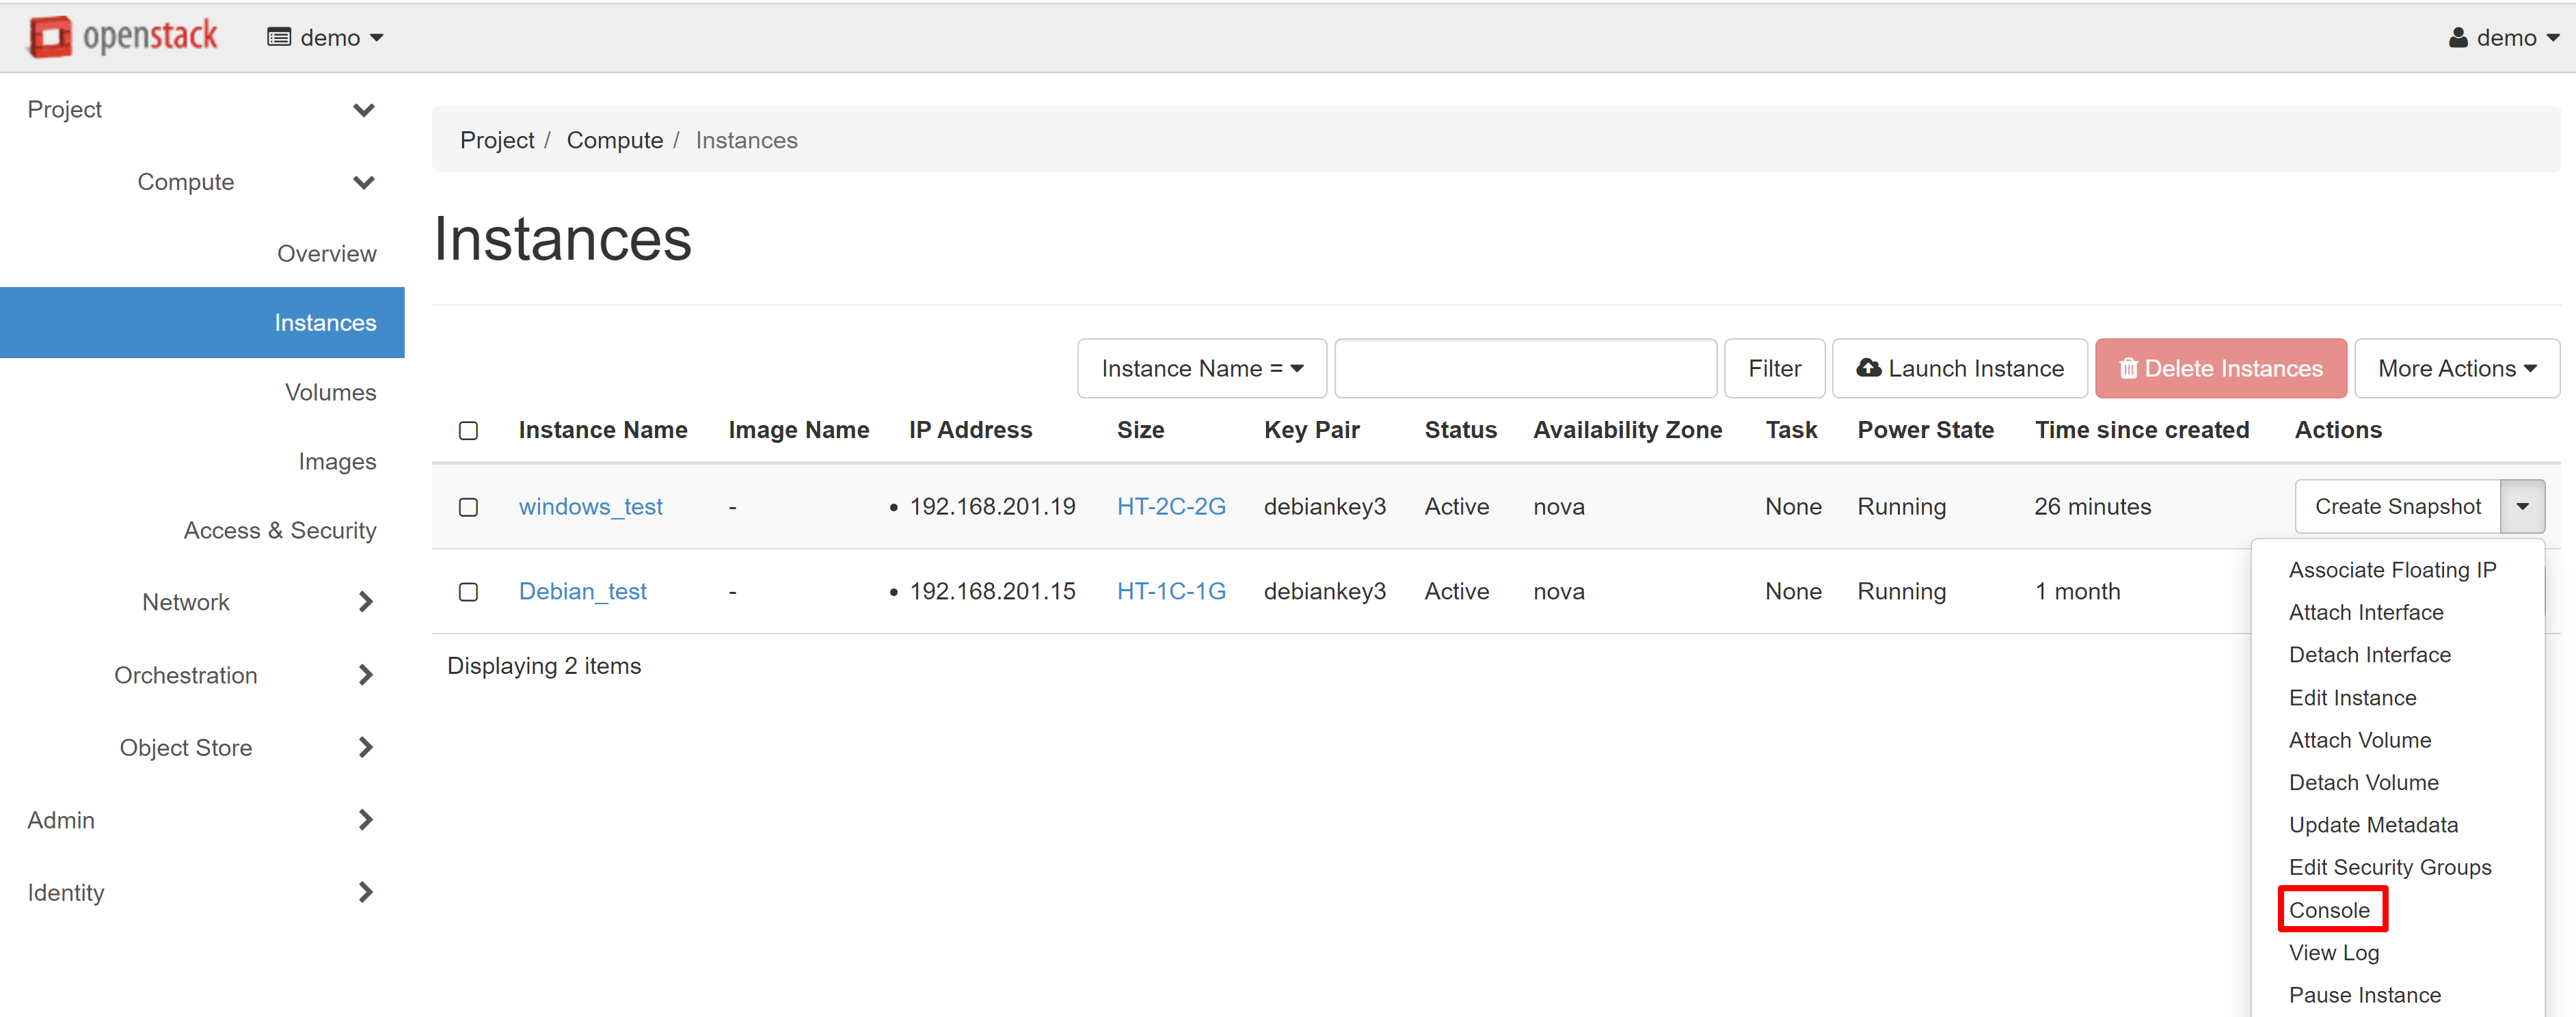
In order to open the VNC console, go to the COMPUTE — INSTANCES section, then select CONSOLE in the drop-down menu next to the desired instance.

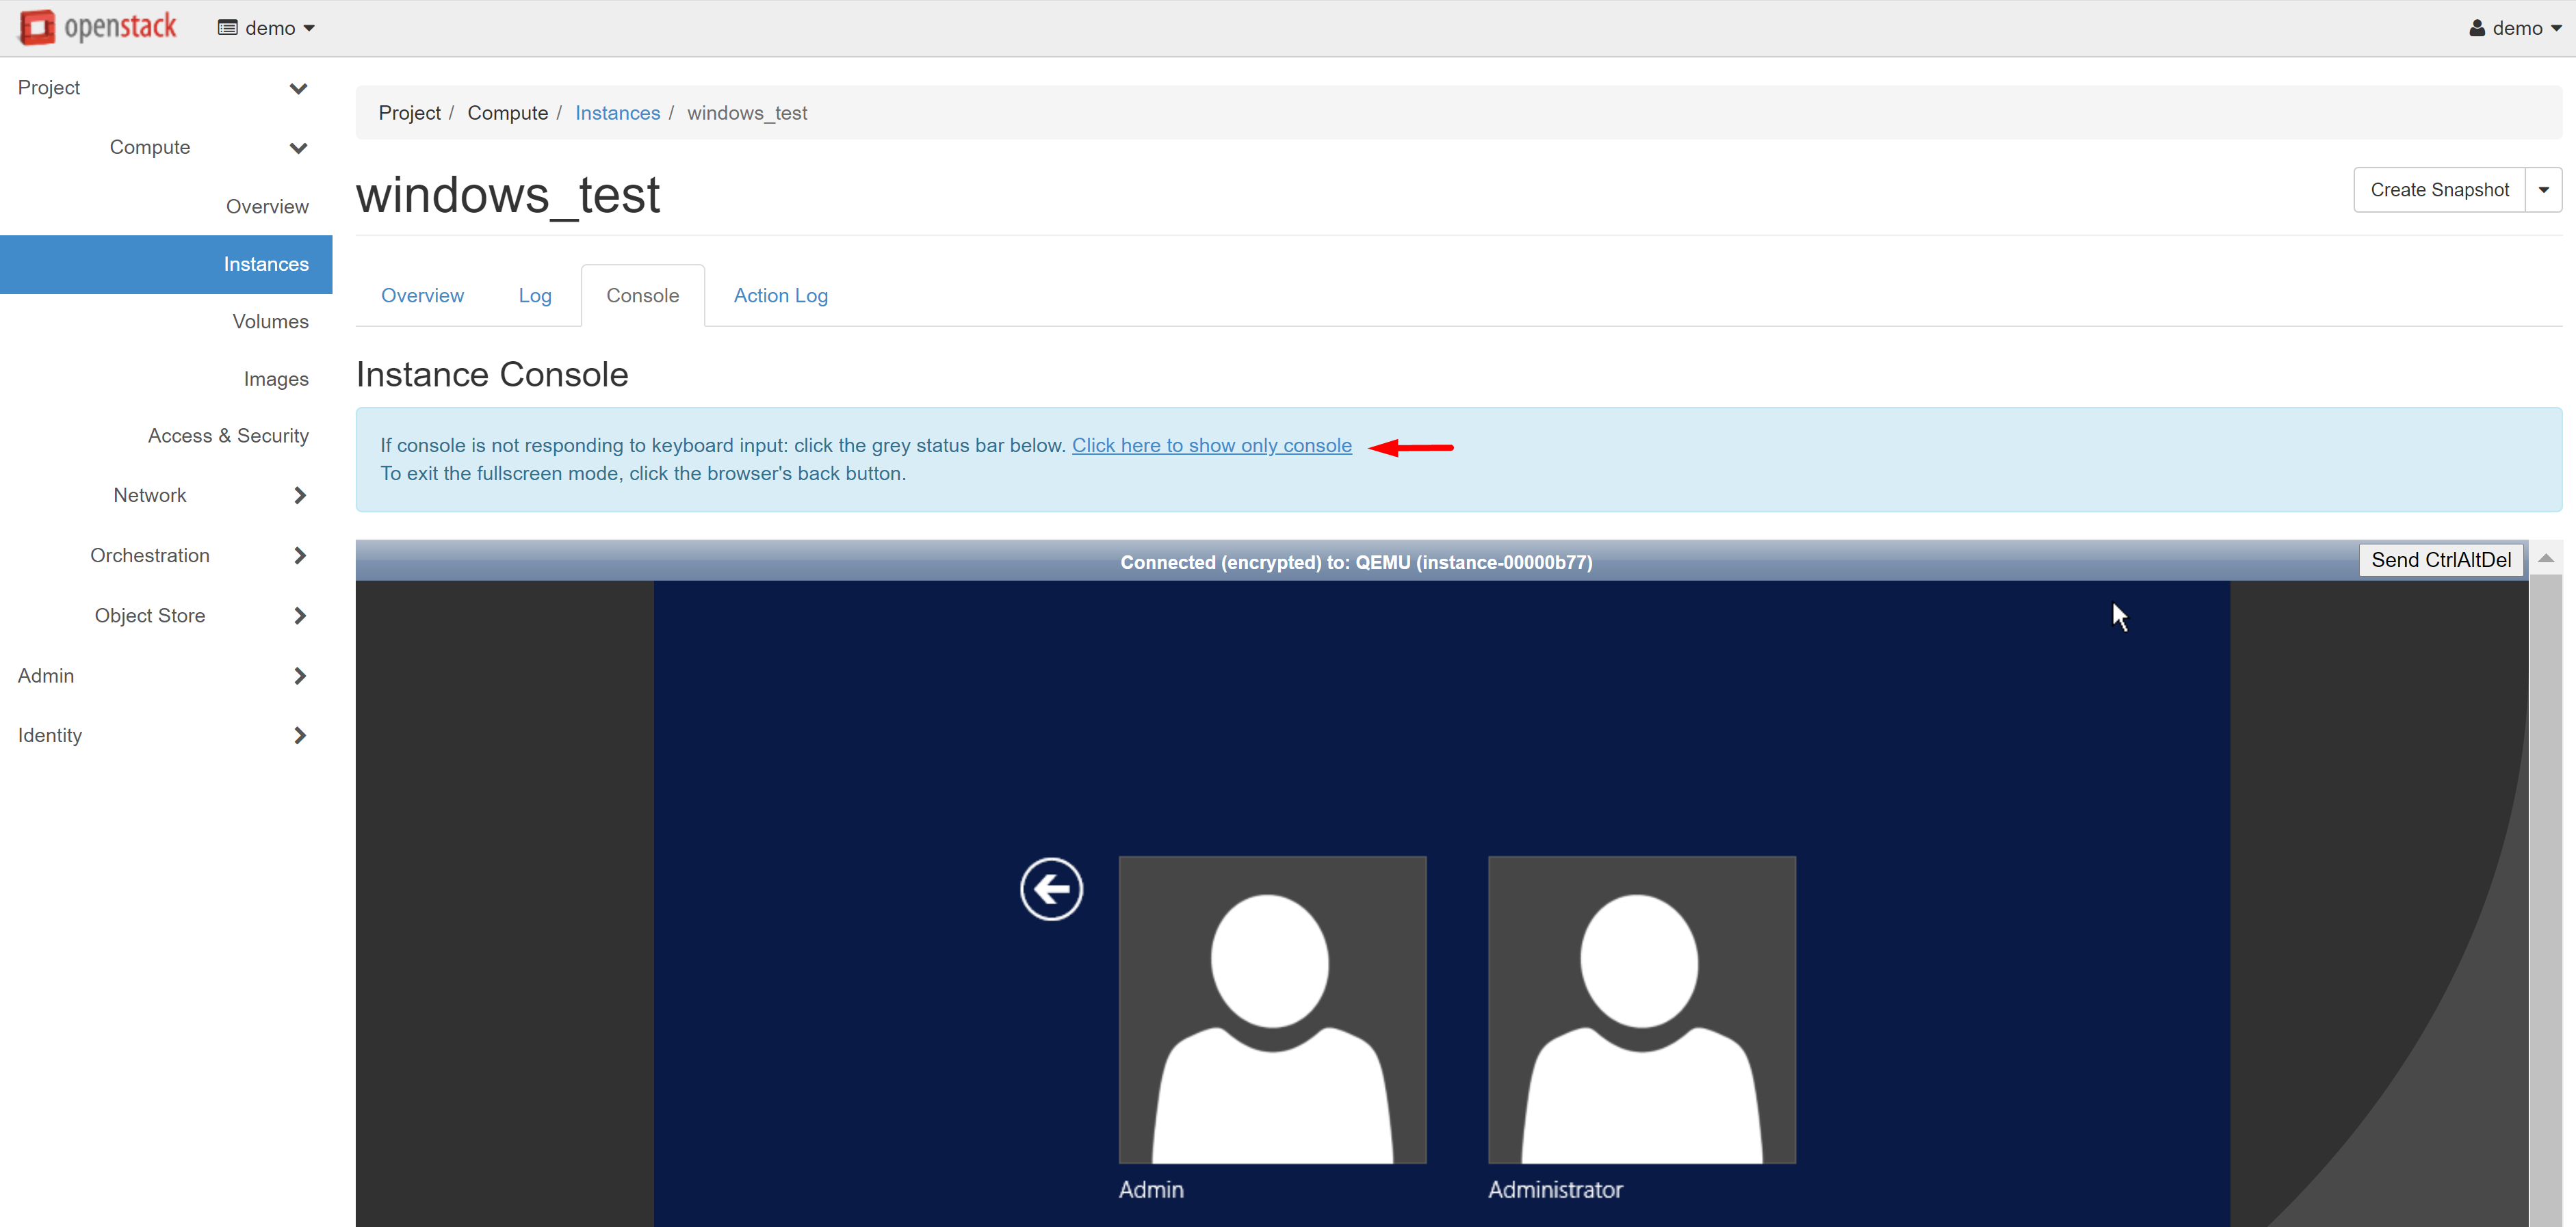
This will transfer you to the CONSOLE tab of your instance, where the remote access screen opens. Alternatively, you can click on the name of the required instance and then go to the CONSOLE tab on the page that opens.
In order to make it easier to work with the console, you can open it in a separate window. To do this, follow the link CLICK HERE TO SHOW ONLY CONSOLE. In order to exit the full-screen mode, click the BACK arrow in your browser.

If you wish to connect to an instance with a Linux/Unix-based operating system, keep in mind that there is no password access in standard images, and for login, the SSH protocol with the creation of a key pair is used.
You can only link SSH keys to a specific instance at the VM creation stage, and this cannot be changed later. This is why it is highly recommended to keep your private key safe and secure.
In order to create an SSH key pair, go to COMPUTE — ACCESS & SECURITY and open the KEY PAIRS tab. Click CREATE KEY PAIR.

In the window that opens, enter a name for your key pair and confirm its creation.

The browser will prompt you to automatically download the SSH private key.
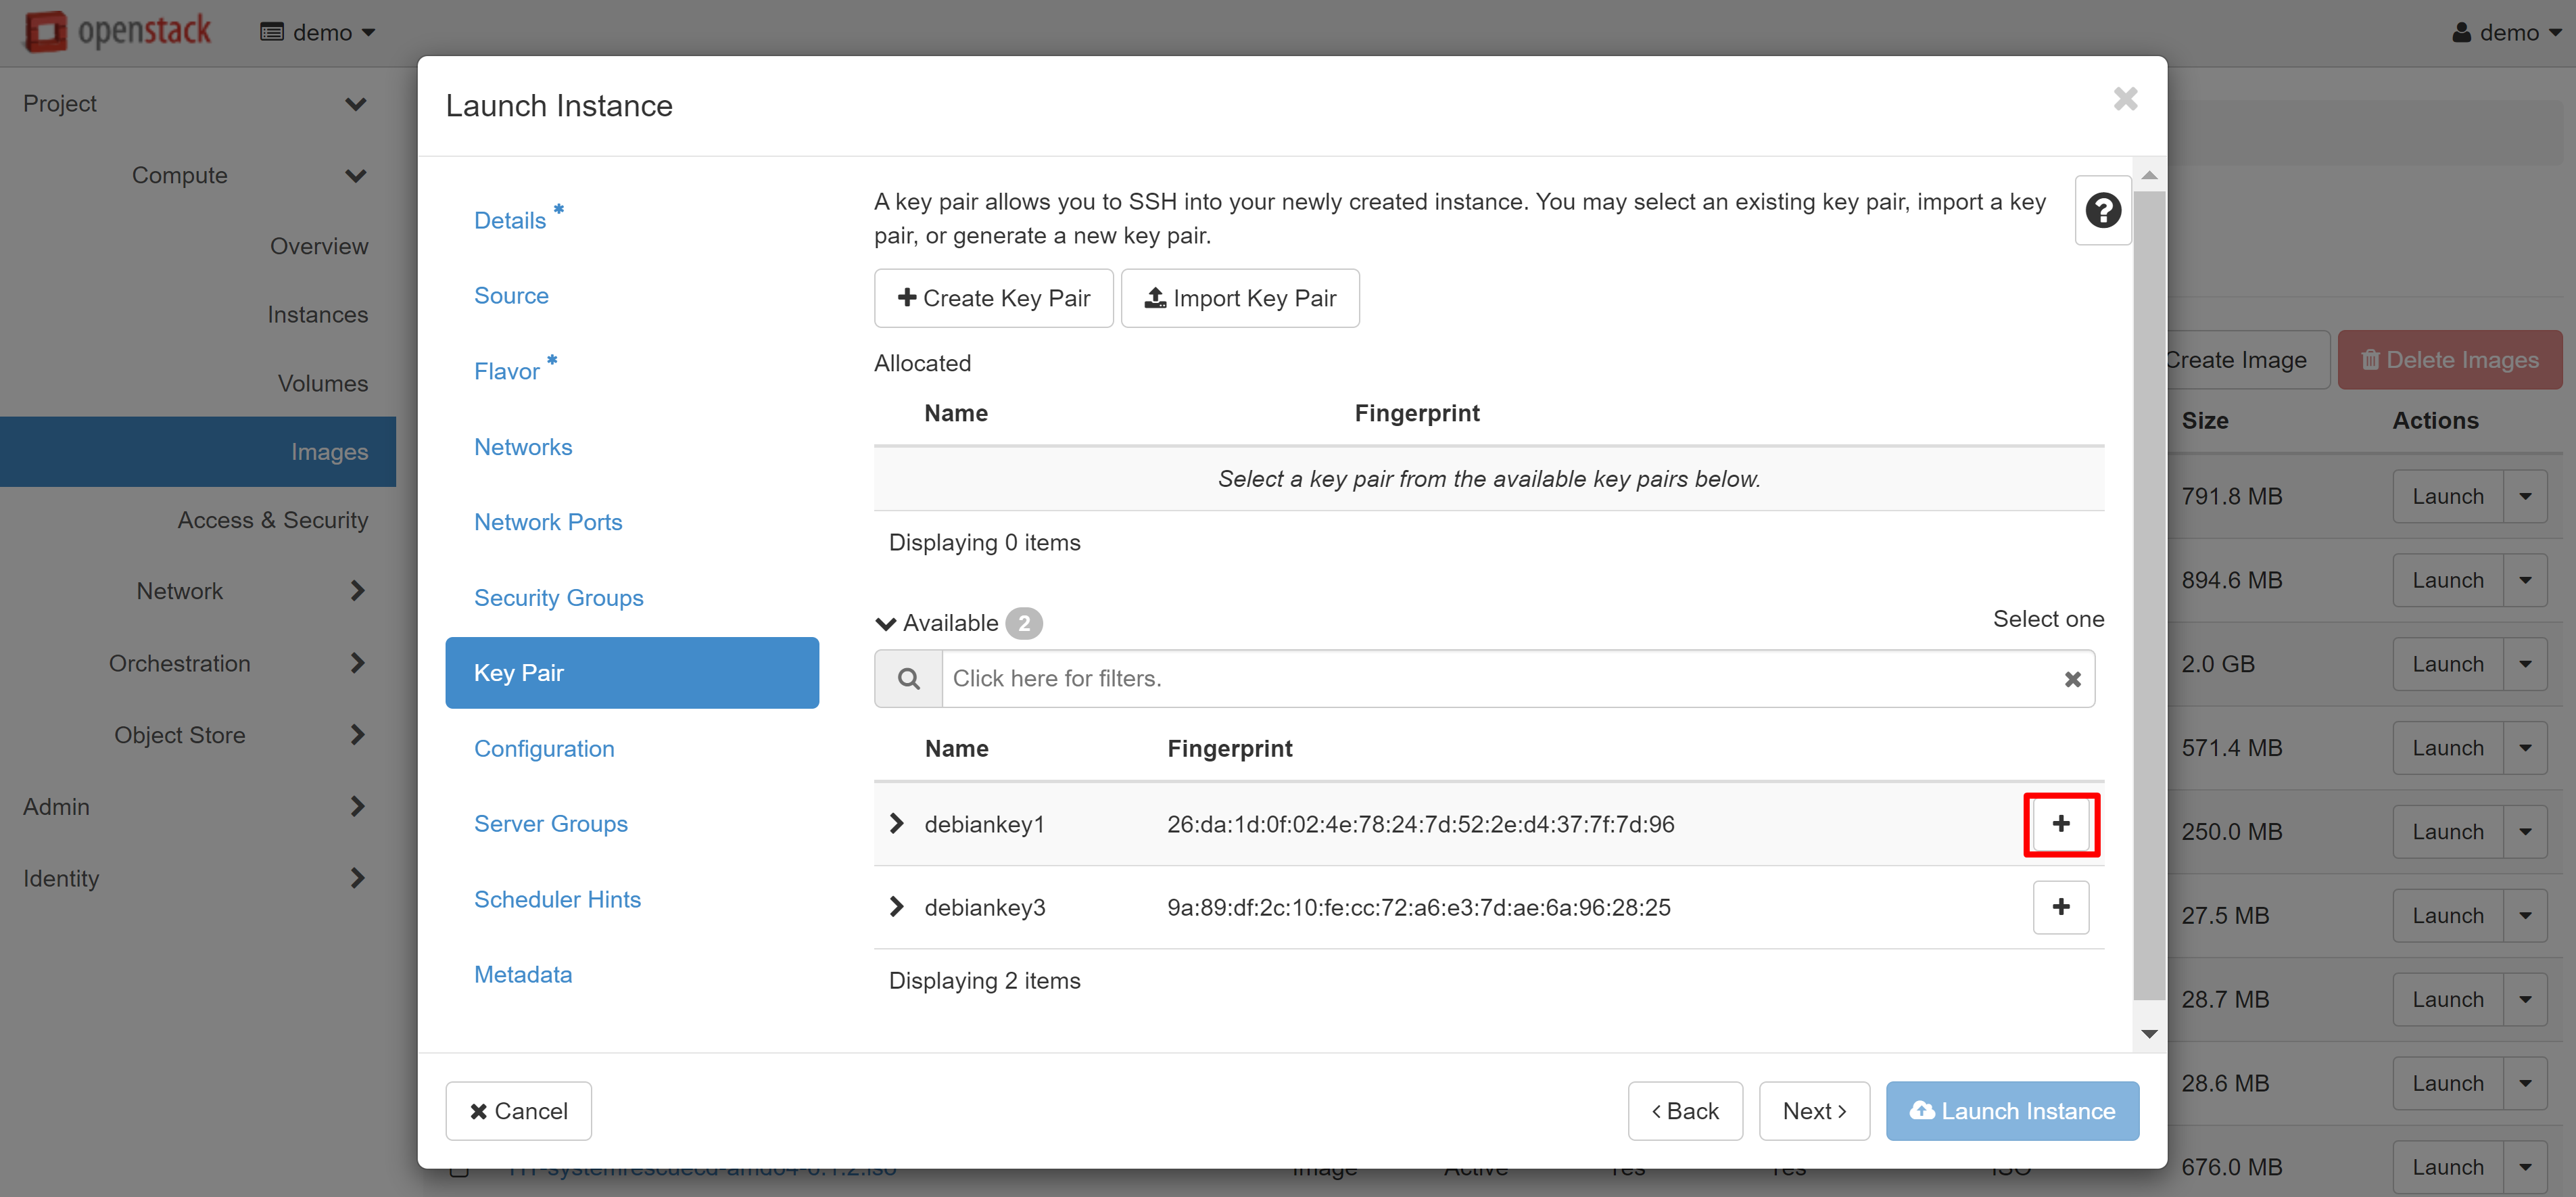
In order to assign keys already created to an instance, when creating a new VM, go to the KEY PAIR menu section and click ‘+’ next to the desired key pair in the list of available ones. You can also import a key pair from your device here.

New key pairs may also be added directly when creating the instance. Read more about this in our manual “Virtual Data Center: Getting Started”.

